7.6 KiB
Proxmox VM Setup Script Specification
This document outlines the specifications for a script that automates the setup of virtual machines (VMs) using the Proxmox API. The script will allow users to create and configure VMs based on predefined templates, manage resources, and handle authentication.
API Documentation
Proxmox API Documentation: https://pve.proxmox.com/wiki/Proxmox_VE_API Proxmox API Schema: https://pve.proxmox.com/pve-docs/api-viewer/index.html
Features
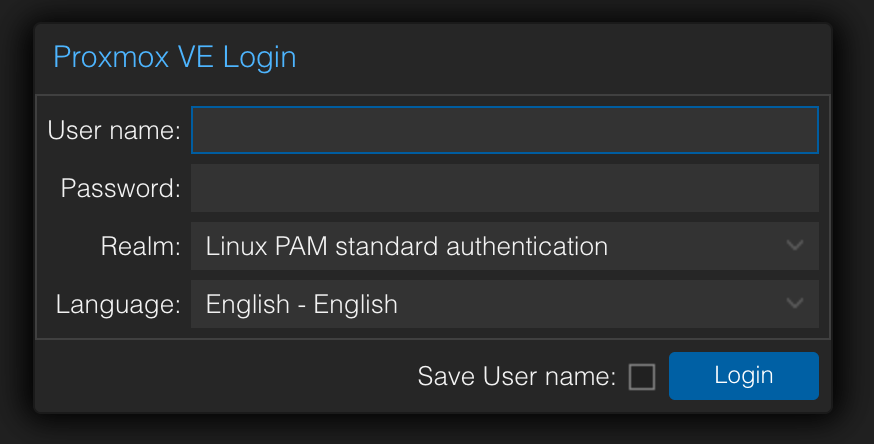
Authentication
The script will prompt users to authenticate using their Proxmox credentials (username and password). It will also allow users to select the Authentication Realm from the available options provided by the API.
Default: The PAM realm will be selected by default, but users can choose other realms if needed.
VM Creation/Configuration
Users will be able to create VMs by selecting from predefined templates. The script will handle the necessary API calls to create and configure the VM based on user input.
UI consistency
Field-like widgets should follow the compact Textual widget-gallery pattern used for single-line controls.
- Most field-like widgets should be 3 rows high by default.
- There must be no blank spacer line between the field content area and the surrounding border.
- Taller controls are only acceptable when a widget is intentionally multi-line or requires additional vertical content.
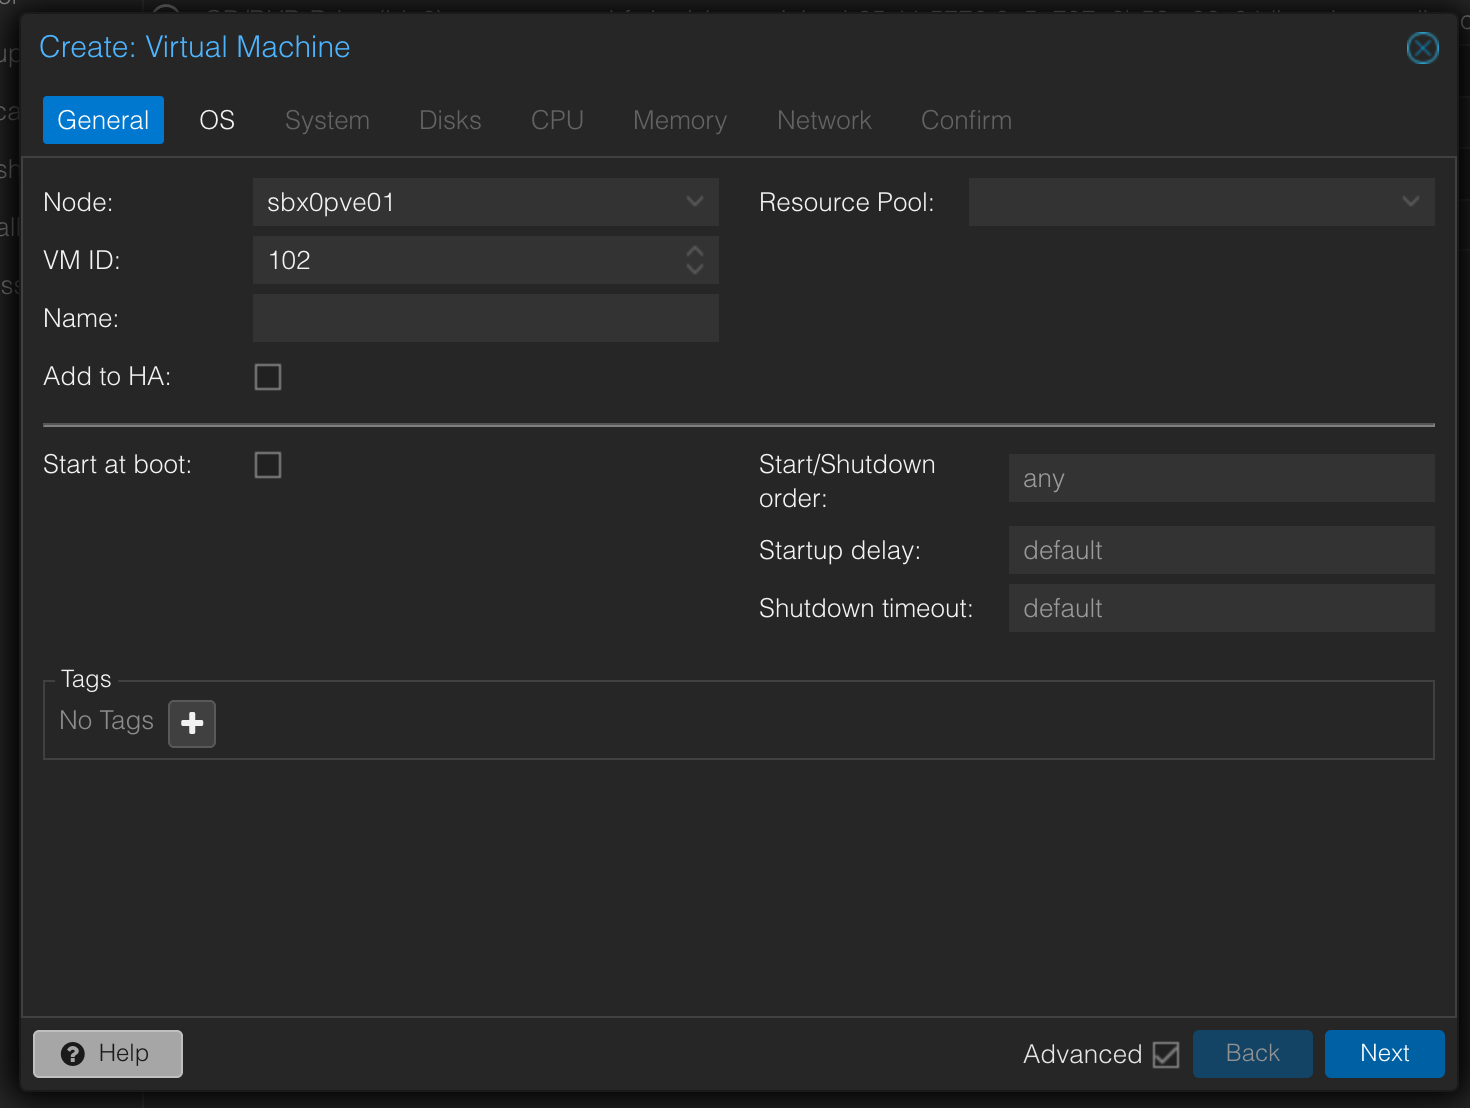
General
This screen will show the general configuration options for the VM, such as:
- Node
- VM ID
- Default: next free VM ID above 100
- Name
- Resource Pool
- Default Empty
- Empty is allowed
- Get available Ressource pools from the server (could be empty / zero / nothing)
- Tags
- List the existing ones
- Allow to add new ones one by one
- Allow also the user to remove tags
- High Availability (HA) (enabled/disabled)
- Default: enabled
- start at boot (enabled/disabled)
- Default: disabled
- start/shutdown order (optional)
- startup delay (optional)
- shutdown timeout (optional)
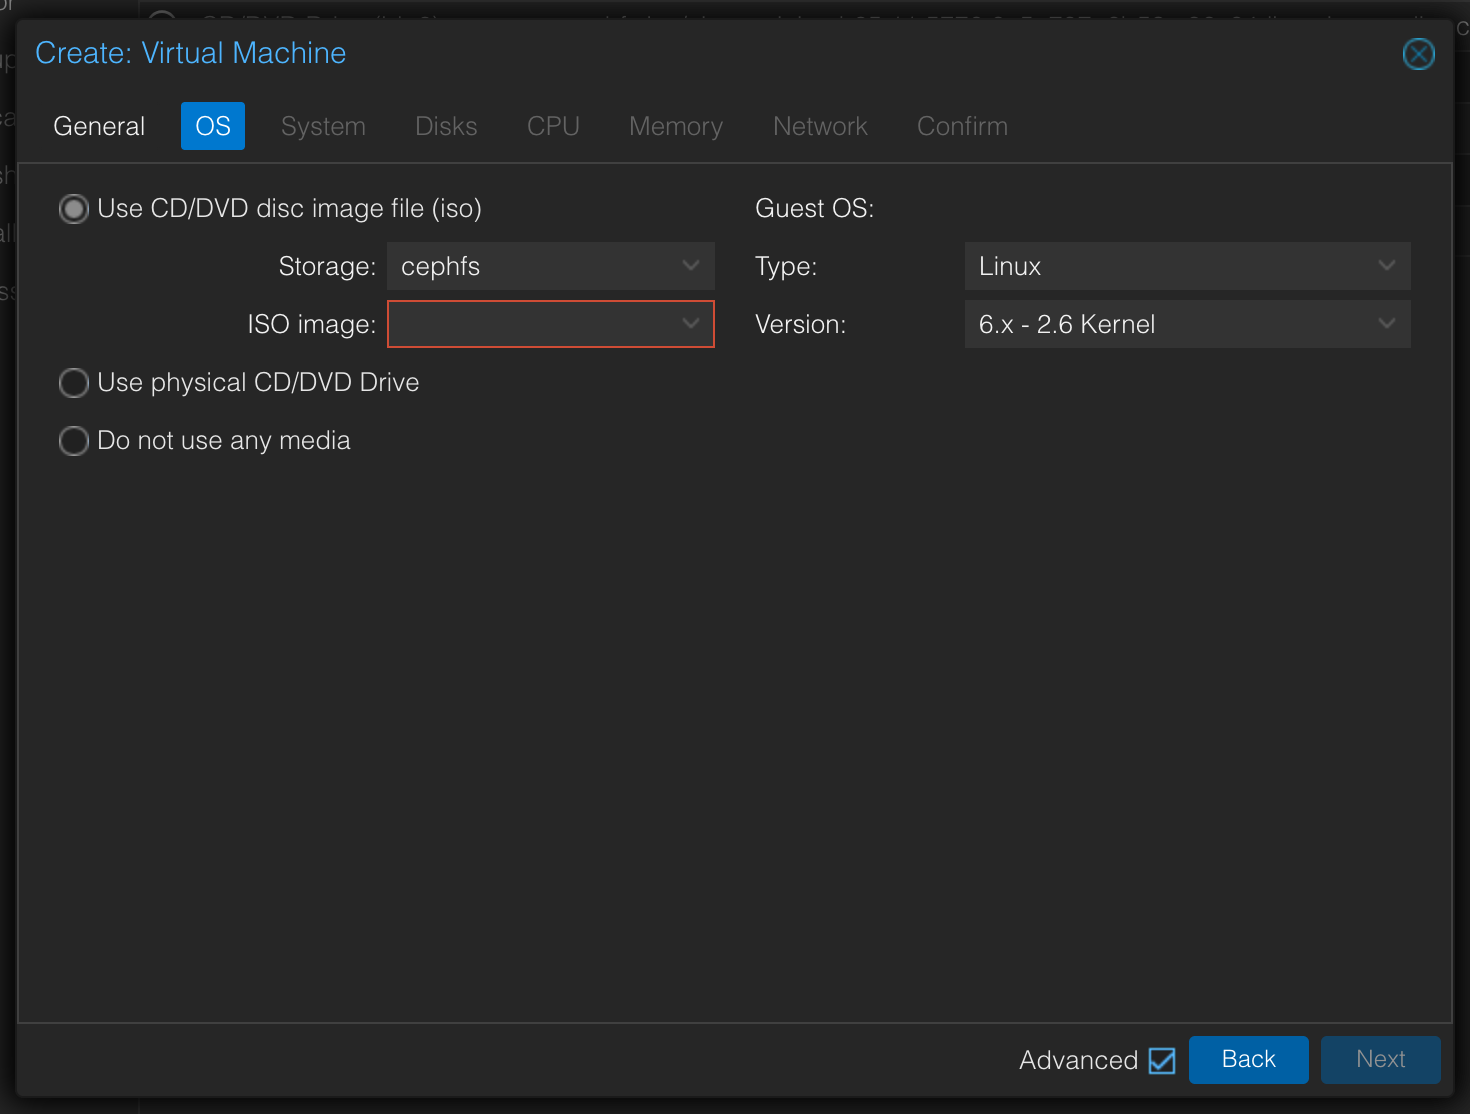
OS
This screen will allow users to select the operating system ISO for the VM. Users can choose from a list of available OS ISO's provided by the API.
- Ask the user if they want to use a CD/DVD disc image file (iso)
- Valid choices are
- ISO
- Physical disc drive
- No
- Valid choices are
- If they've chosen "ISO"
- Let them choose the storage from which they want to use the iso from (get available from the API)
- Default: cephfs
- Let them choose the iso (load available iso's available at the storage via the api, when the storage changes load the ISO's again, the could be empty)
- Default: the latest available nixos-minimal iso (schema nixos-minimal--..-linux.iso
- Let them choose the storage from which they want to use the iso from (get available from the API)
- Let the user select the Guest type and Version
- Default Type: Linux
- Default Version: 6.x - 2.6 Kernel
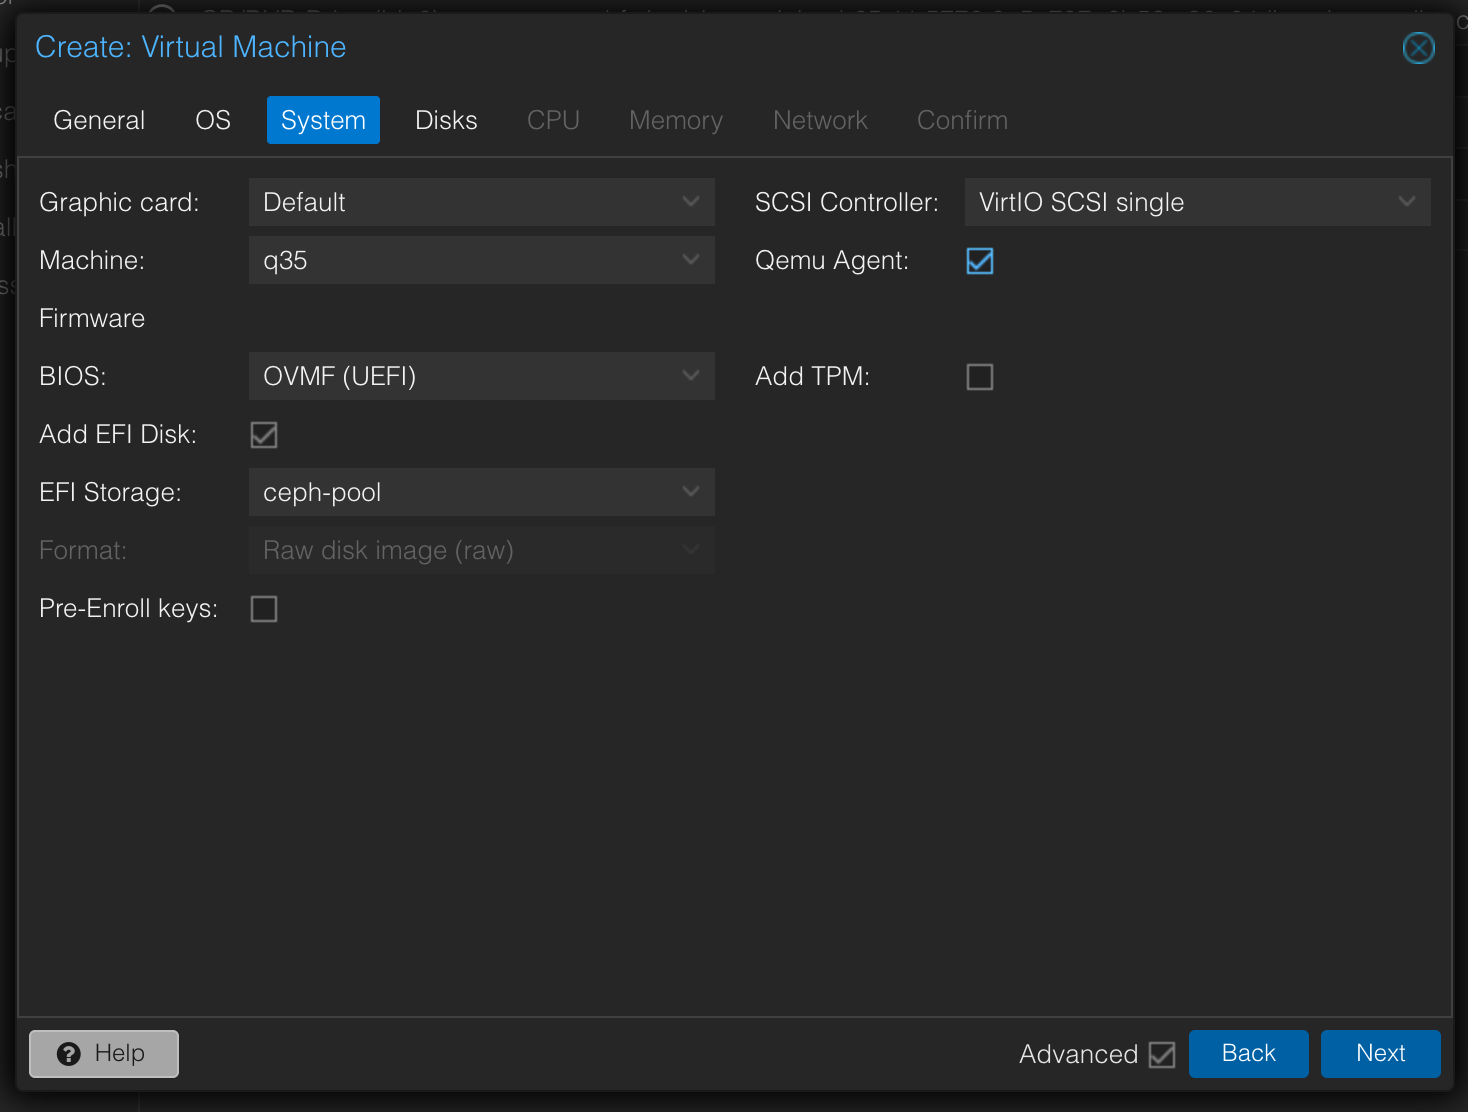
System
This screen will allow users to configure the system settings for the VM, such as Graphic card, Machine, Firmware BIOS, Add EFI Disk, EFI storage, Pre-Enroll keys, SCSI Controller, Qemu Agent and if a TPM should be added.
- Graphic card
- Default: Default
- Machine
- Default: q35
- Formware BIOS
- Default: OVMF (UEFI)
- Add EFI Disk (enabled/disabled)
- Default: enabled
- EFI storage
- Default: ceph-pool
- Pre-Enroll keys (enabled/disabled)
- Default: disabled
- SCSI Controller
- Default: VirtIO SCSI single
- Qemu Agent (enabled/disabled)
- Default: enabled
- TPM (enabled/disabled)
- Default: disabled
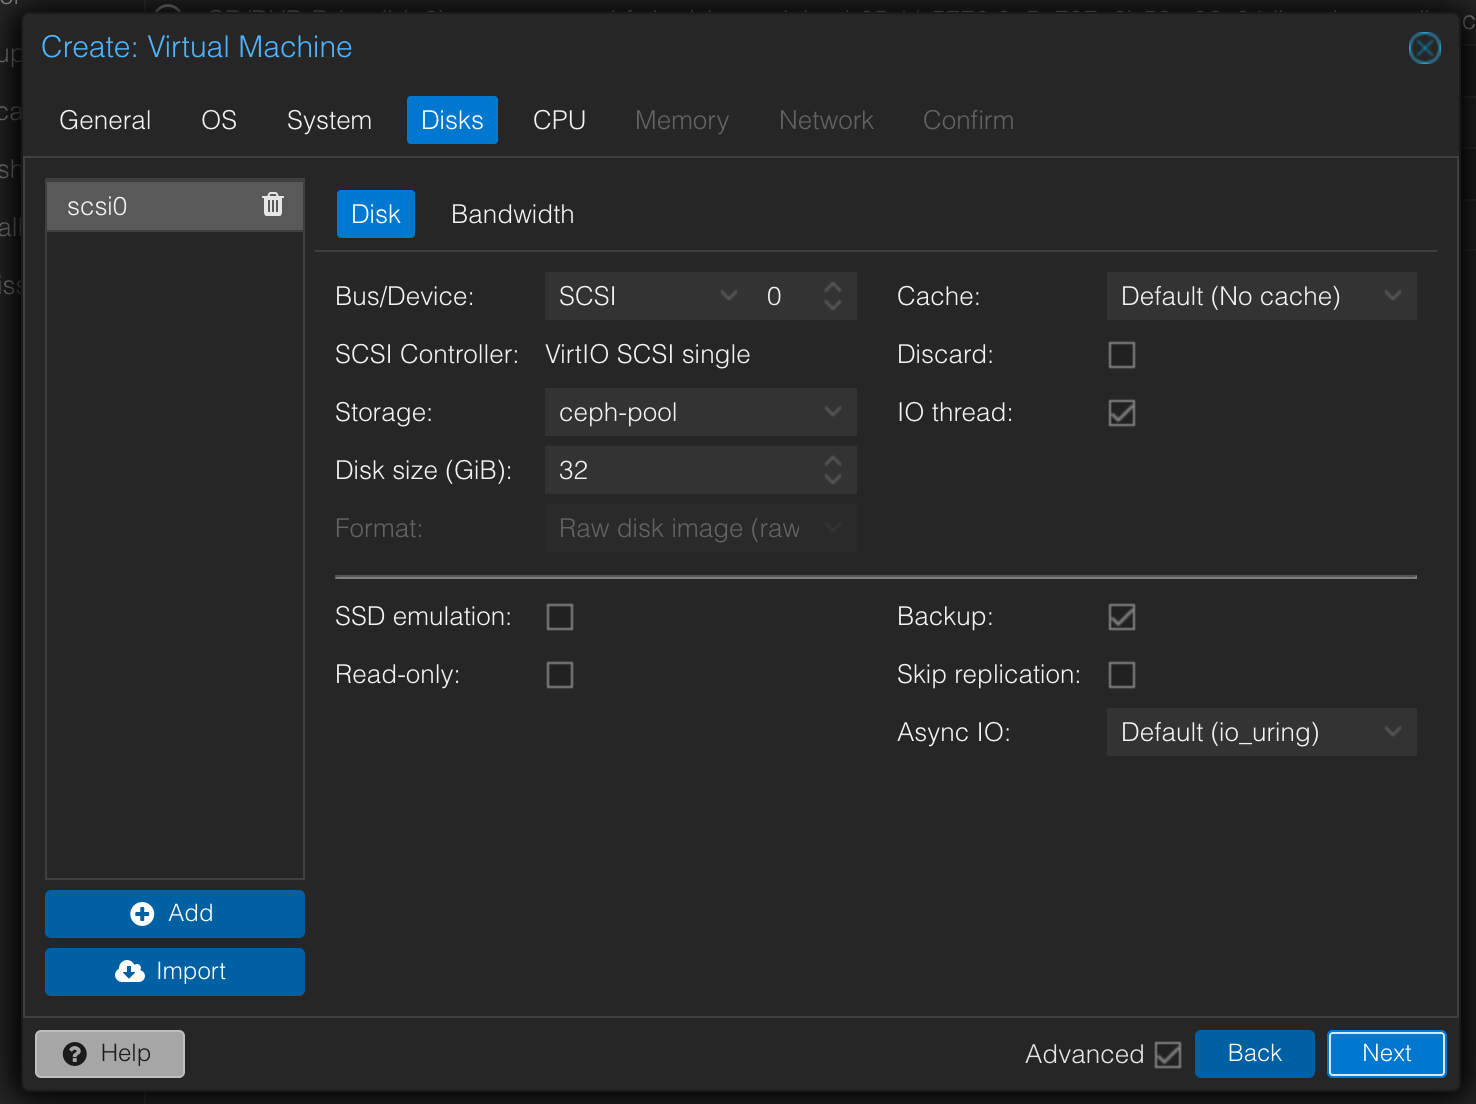
Disks
This screen will allow users to configure the disk settings for the VM, such as Disk size, Storage, and Format.
- Allow the user to add zero to multiple disks
- For each disk, ask the user for the following information:
- Allow the user to add/modify/remove disks one by one
- Bus/Device
- Default BUS: SCSI
- Default Device: increasing integer starting from 0 (e.g. SCSI0, SCSI1, ...)
- Storage
- Default: ceph-pool
- Disk size (GiB)
- Default: 32 GiB
- Format
- Default: RAW (not changeable)
- Cache
- Default: no chache
- Discard
- Default: disabled
- IO Thread
- Default: enabled
- SSD emulation
- Default: enabled
- Backup
- Default: enabled
- Skip replication
- Default: disabled
- Async IO
- Default: io_uring
CPU
This screen will allow users to configure the CPU settings for the VM, such as Cores, Sockets, and CPU Type.
- Cores
- Default: 2
- Sockets
- Default: 1
- CPU Type
- Default: host

Memory
This screen will allow users to configure the memory settings for the VM, such as Memory size and Ballooning.
- Memory size (MiB)
- Default: 2048 MiB
- Min Memory (MiB)
- Default: same as Memory size
- Ballooning (enabled/disabled)
- Default: enabled
- Allow KSM (enabled/disabled)
- Default: enabled

Network
This screen will allow users to configure the network settings for the VM, such as Network Model, Bridge, and VLAN.
- No Network device (enabled/disabled)
- Default: disabled
- Bridge
- Default: vmbr9
- VLAN Tag
- Default: none
- Model
- Default: virtio
- MAC Address
- Default: auto-generated by the API
- Firewall (enabled/disabled)
- Default: enabled
- Disconnected (connected (enabled)/disconnected (disabled))
- Default: disabled
- MTU
- Default: none (Same as the bridge)
- Rate Limit (MB/s)
- Default: none (unlimited)
- Multiqueue (integer)
- Default: none

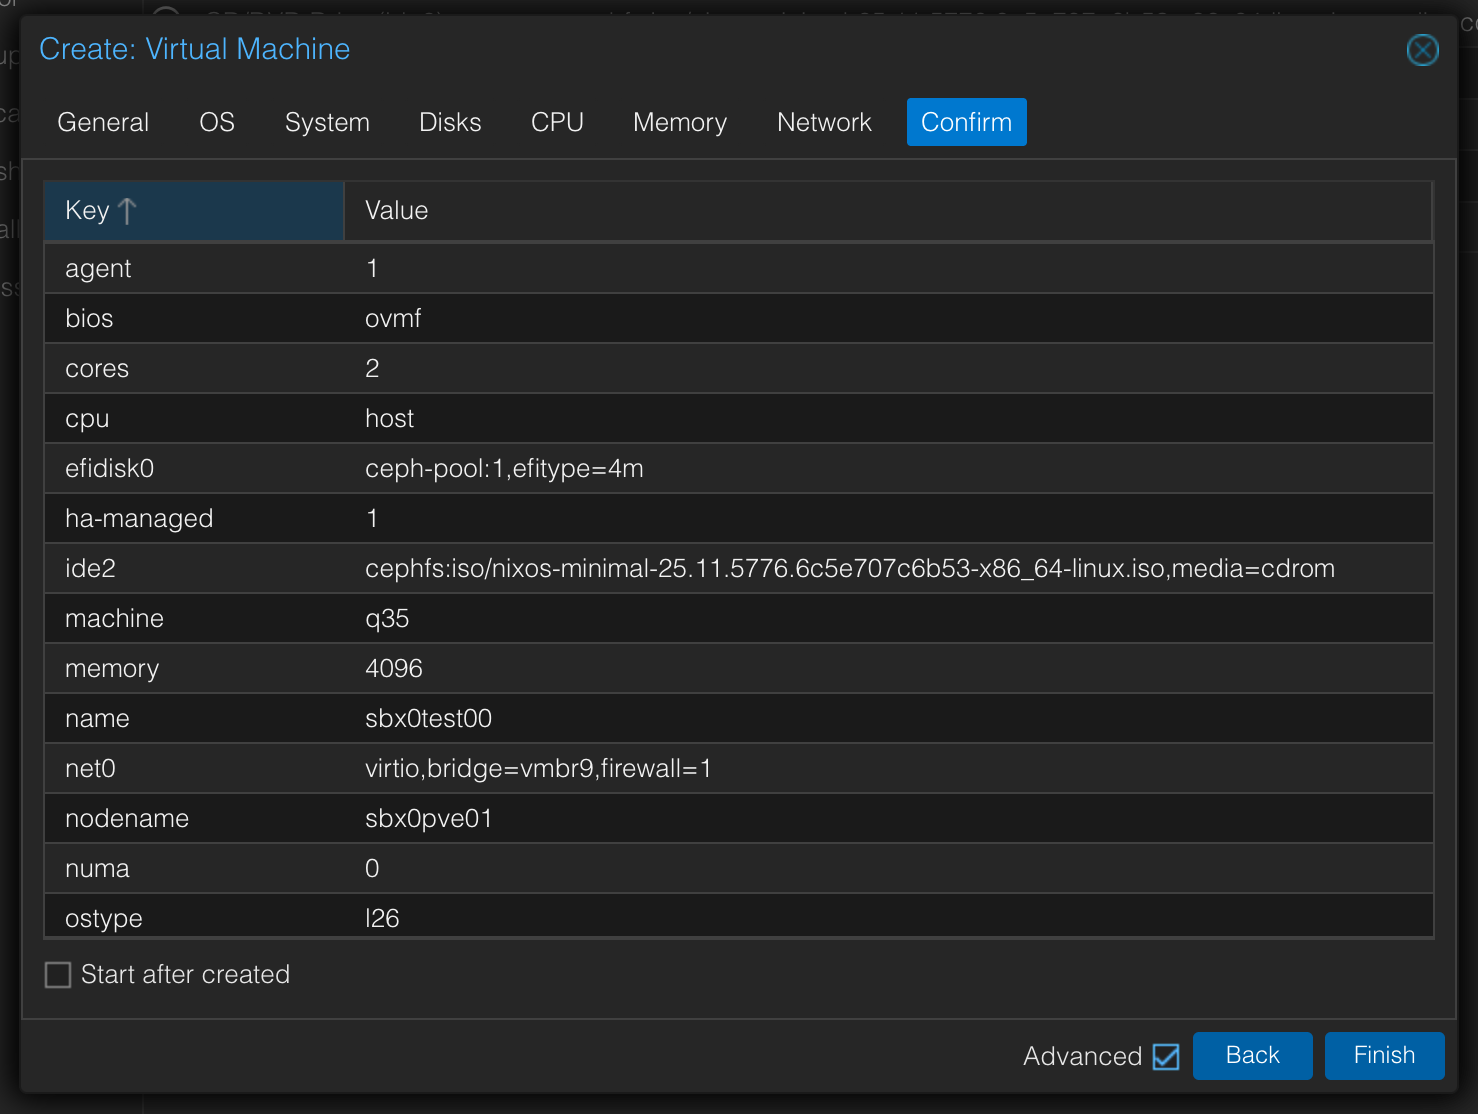
Confirm
This screen will display a summary of the VM configuration and allow users to confirm the creation of the VM.
- Start at boot (enabled/disabled)
- Default: disabled
- Display a summary of the VM configuration, including all the settings configured in the previous steps.
- Provide a "Create VM" button that, when clicked, will send the API request to create the VM with the specified configuration.
- After the VM has been created successfully, run the required follow-up configuration to enable the Proxmox VE serial console in the web UI.
- Add a serial port using
serial0with valuesocket - Set the display to
serial0so the Proxmox VE web console opens the serial terminal via xterm.js - If the follow-up serial-console configuration fails, show that clearly as a separate post-creation error state because the VM itself may already exist
- Add a serial port using
Error Handling
The script will include error handling to manage API errors, authentication failures, and other potential issues that may arise during the VM setup process.
Testing
The script will be tested using Textual interaction tests with run_test() and Pilot. Business logic will be kept in a central module, and testing will include running pytest, ruff check .., and ruff format .. . Add snapshot coverage for default, loading, and error states. For form-heavy screens, use snapshot coverage and visual review to confirm that single-line field widgets render as compact 3-row controls and do not show an empty spacer line inside the border.
Documentation
The script will be well-documented, summarizing changes and any unresolved UX concerns. Document any intentional deviation from the compact 3-row field-widget layout or the no-inner-spacer rule as an explicit UX choice.